How to Enable Photo Geotagging on Mobile Phone
If you are completing a virtual inspection of your offices as part of your onboarding with MonitorBase and need to enable photo geotagging on your mobile phone, this article will show you how to do that.
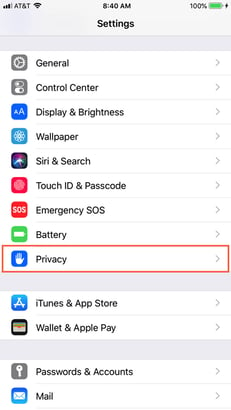
For iPhone:
- Open the Settings app on your iPhone.
- Navigate to the "Privacy" section.
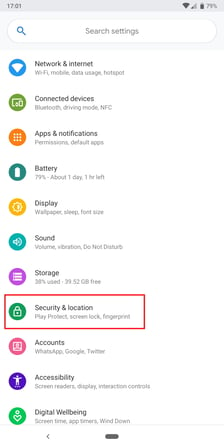
 Click "Location Services" at the top.
 - Click the Camera App in the list of options.
- Change Allow Location Access to “while using the app”. If it is already set to "while using the app" then it is already enabled for you, and you don't need to do anything. Also, ensure that the "Precise Location" option is enabled. The switch will appear green if correct.
For Android:
- Go to your Android device's home screen, then press the "Menu" button. Tap "Settings" to access the settings menu.
- Tap the "Location" option. Note that on some Android devices this may be labeled "Location and Security."
- Tap the option labeled "Use GPS Satellites." This option must be turned on for the geotagging option to work.
- Press the "Home" button to go back to the main screen, then tap the camera icon to launch your Android smartphone's camera.
- Tap the "Menu" button once the camera application loads, then tap the "Settings" option. On some Android cameras, this option will simply be a small cog icon.
- Scroll down to "Store Location in Pictures," or "Geotag Photos," depending on your OS version, and tap that option to put a green checkmark next to it. Tap "OK" when you see a message telling you that the GPS function needs to be turned on.